

In this blog we cover a simple CI/CD example using Azure DevOps and Azure CDN. Our goal is to publish a webpack build to the CDN when changes are pushed to a Git branch.
Creating an Azure CDN endpoint
In order to create a new Azure CDN endpoint you first need to make sure that you have an active Azure account. If you don’t already have an Azure account you can create a new one here.
Create an Azure storage account
The first step when setting up a new CDN endpoint is to create a storage account that will hold all your assets. The CDN caches the content of your storage account and exposes it through the endpoint that you will create below. Read more about creating and Azure storage account here.
Create an Azure CDN profile and Endpoint
Once you have set up your storage account, you can go ahead and create an new CDN profile and endpoint. You can read about creating the profile and endpoint in Mircosoft’s offical docs. I would recommend using the Azure CDN Standard from Microsoft if you do not have very specific needs regarding how the CDN should behave.
Once you have completed the steps above you should have your very own CDN up and running with an endpoint that looks something like this: https://your-cdn-endpoint.azureedge.net.
webpack setup
As there are many guides that cover general webpack setup, we will only mention a few things that we find beneficial for the CI/CD process in the webpack.config.
Cache busting
To make sure the CDN always deliver the latest file versions we utilize webpack’s Output property to name the emited bundle files. In this example we use chunkhash to name our files.
// webpack.config.js\t\t
module.exports = {
 // ...
 output: {
 // ...
 filename: '[name].[chunkhash].js'
 }
};
This will generate filenames that look like: app.0a59a86f5f04cd1da625.js. You can read more about webpack caching here.
Public path
Since we are going to be using a CDN to host our assets, we have to set the base path for all our application assets. This is done by setting the publicPath option to the CDN endpoint hostname.
// webpack.config.js\t\t
module.exports = {
 // ...
 output: {
 // ...
 publicPath: 'https://your-cdn-endpoint.azureedge.net',
 filename: '[name].[chunkhash].js'
 }
};
Asset manifest
We will also be using the webpack-manifest-plugin to generate a manifest.json file as part of the build. This will allow us to identify the correct output file names for our source files.
// webpack.config.js\t\t
const ManifestPlugin = require('webpack-manifest-plugin');

module.exports = {
 // ...
 plugins: [
 new ManifestPlugin()
 ]
};
manifest.json example
// manifest.json\t\t
{
 'runtime~app.js': 'https://your-cdn-endpoint.azureedge.net/runtime~app.bc9d02a19fd6cba183df.js',
 'vendors~app.js': 'https://your-cdn-endpoint.azureedge.net/vendors~app.775c28f32146871f9e9d.js',
 'app.js': 'https://your-cdn-endpoint.azureedge.net/app.cc91b80d22a21f16f98d.js'
}
Azure Pipelines CI/CD setup
To get started with Azure DevOps you must first create new Azure DevOps organization. Once you have created your new account, you need to create a new project. You should now be ready to create your first pipeline.
Create a build pipeline (CI)
Navigate to Pipelines in the left menu inside your newly created project and click New Pipeline in the top right corner. Go through the steps and connect the pipeline with your Git repository. It’s easiest to select one of the hosted agent pools when creating a new build pipeline.
Pipeline trigger
Create a new pipeline trigger and check Enable continuous integration.

Select the branch you want to watch. In this example we have chosen the master branch. This means that when we push changes to this branch, a new build pipeline will run.
Build pipeline tasks
We are now ready to create some pipeline tasks. First, make sure that Get Sources is correctly connected to your Git repo and branch.
Click the 3 dots to the right of your pipeline name and select Add an agent job. Give the agent job a name e.g “Frontend Build”. You can now start adding tasks to the newly created agent job.
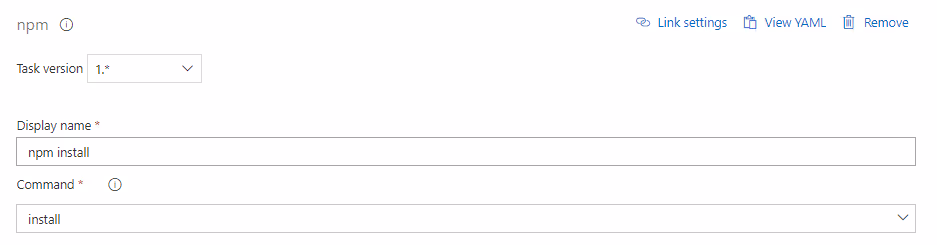
In total, we are going to add 4 tasks to our agent job.

The first tasks runs npm install
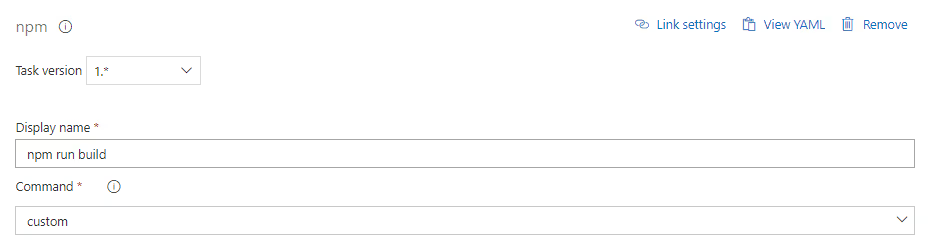
The second task runs npm build
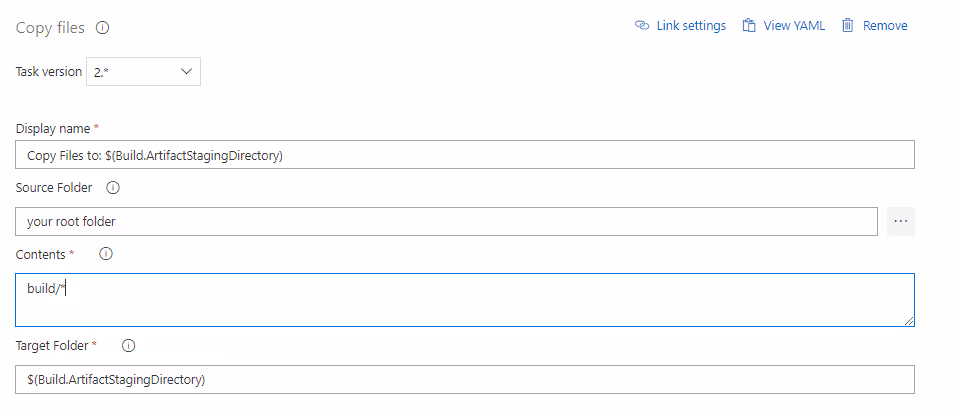
The third task copies build files to an Artifact for further use
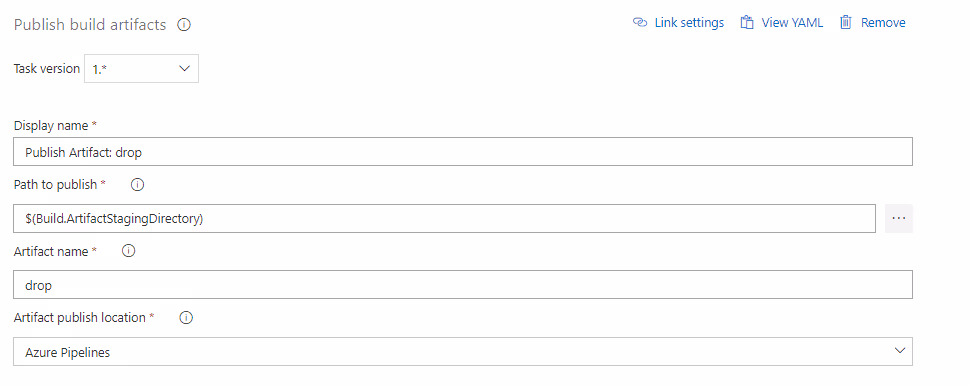
The final task publishes the build artifact that contains all your build files that was generated by npm run build.
Create a release pipeline (CD)
We can now go ahead and create a new release pipeline. Navigate to Releases in the left menu and click New above the list of pipelines.
When our build pipeline has completed, we want it to get picked up by the release pipeline. Under Artifacts, connect the build trigger with your build pipeline.
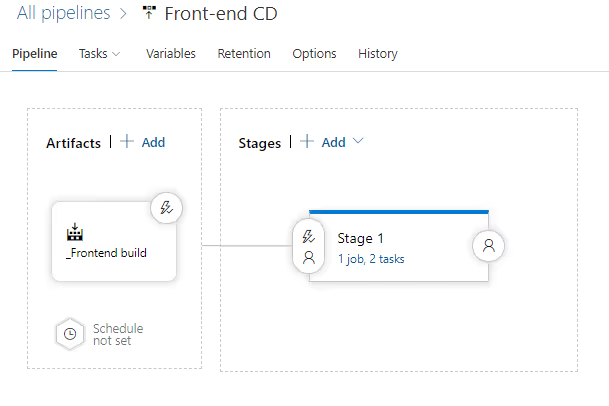
Release pipeline tasks Start by creating a new agent job similarly to the build pipeline. We are going to include 2 tasks in this agent job.
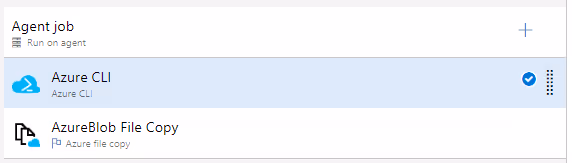
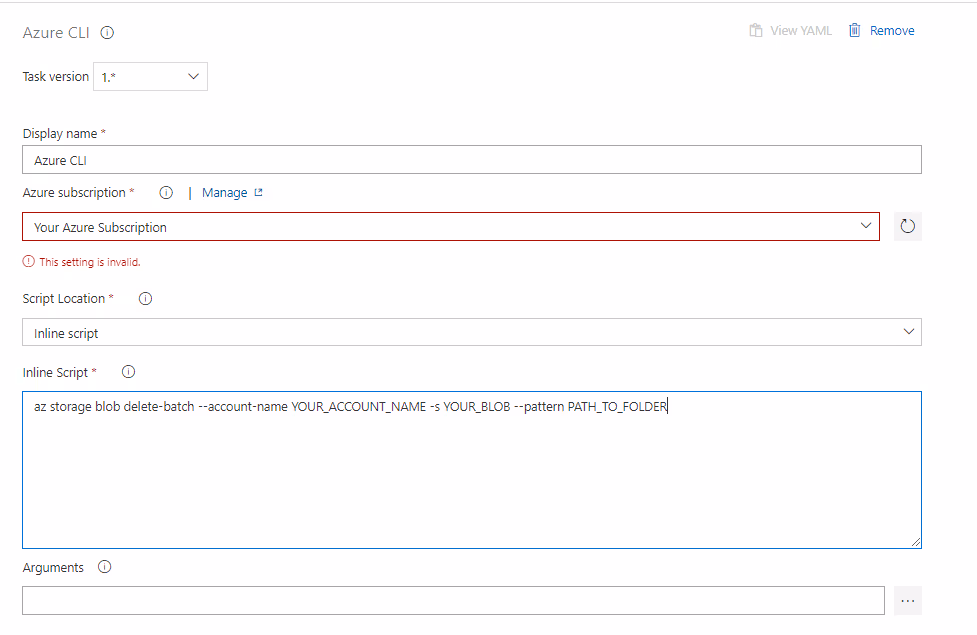
The first task in an Azure CLI task that will delete the existing content in the storage account blob. This is to avoid having a lot of old files laying around in storage.
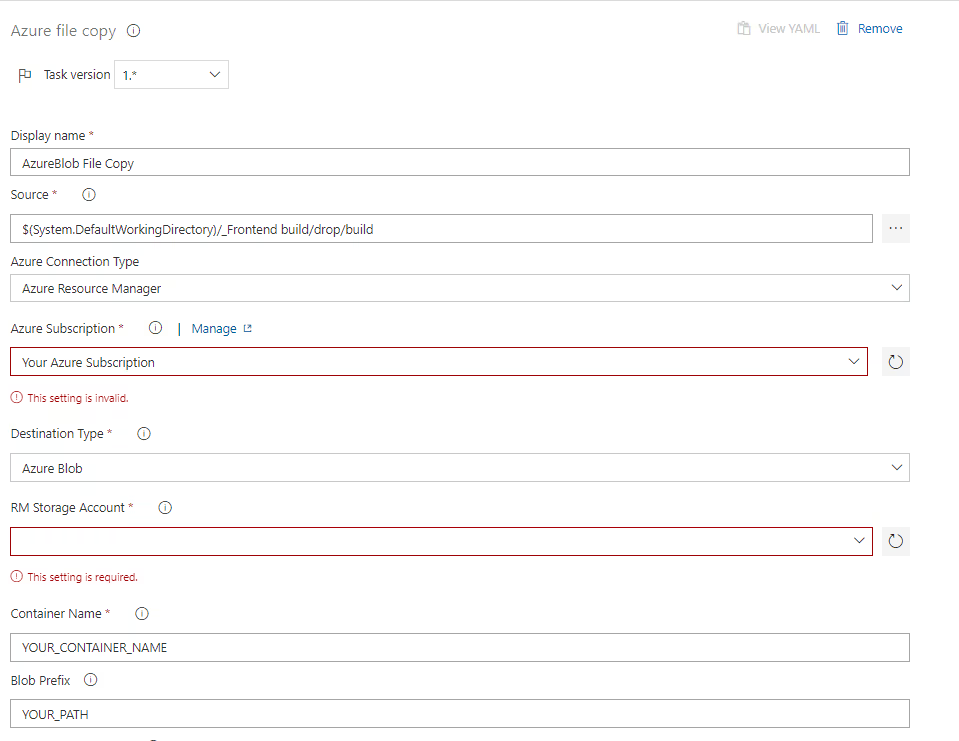
The next task is an Azure file copy task that takes the files included in your build artifact and adds them to the storage.
You are now all set, every time you push changes to your master branch, the files in your storage account will be replace with the files related to the new build.
You can navigate to https://your-storage-account.net/manifest.json to see the path to all the assets included in your build. We use the storage account url instead of the CDN url here since we don’t want a cached version of the manifest.json file. If you want to retrieve this from the CDN you will have to purge the CDN endpoint.
You can then use this on your server to make sure you always request the correct files from the latest build.
Happy coding!